


I haven’t had a wedding since the end of September. I didn’t tackle any professional holiday decorating projects this year {did you know that I offer holiday décor services and have several restaurants and other home décor projects on my resume?}. I finished my Christmas shopping before December 1st. All of this should have added up to loads of free time. I thought I would have the most relaxed December and I would fill my time doing holiday décor tutorials, creating wreaths, making cookies for acquaintances and writing lots of holiday cards.
Honestly, I’m a little embarrassed to admit that I don’t know what I’ve done with my time, but I’ve been busy. My house is very fully decorated and I love it this year, we hosted our first ever holiday party here (which means we’ve finally made a few friends after 1 ½ of living in a new town!) and I really have enjoyed the holidays so far, they just haven’t gone as I originally planned.
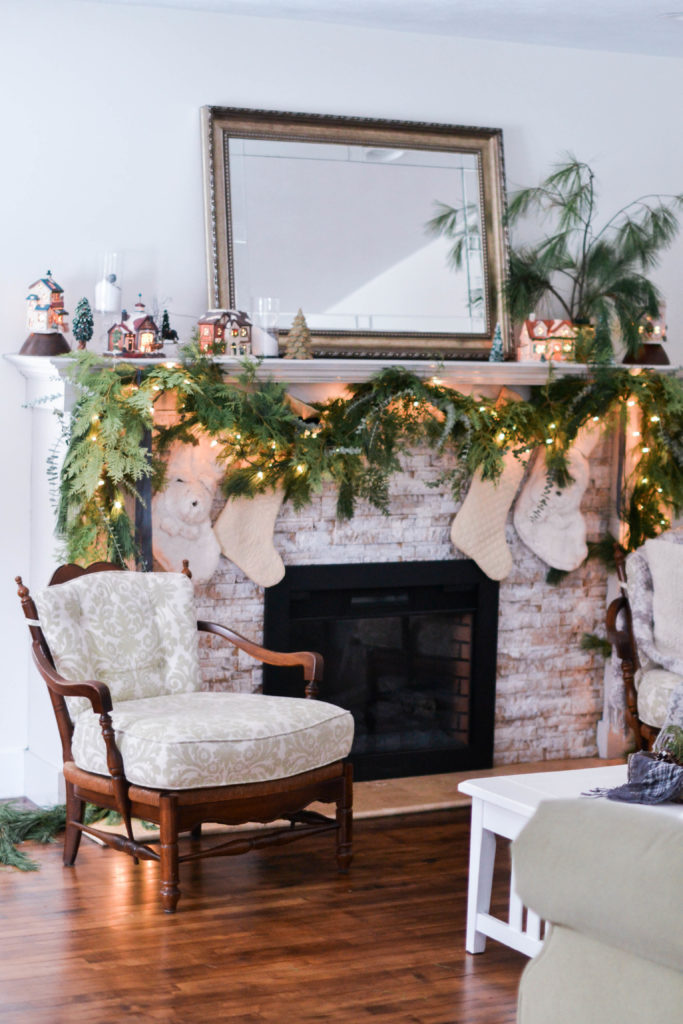
But I do have one tutorial to share with you, in case you’re stuck and still preparing your home for the pending holiday this weekend. This is one of my go-to cheats, because even as a professional florist, I hate making garlands. So basically, I like to buy someone else’s flimsy and cheap looking one to use as a base and then beef it up a little, adding my own flare.
For this project you’ll need a base garland. I used a simple white pine one from Sam’s Club (I think they’re on clearance for $4 right now). You could also use an artificial one. I personally though, love fresh greens throughout my house and incorporate as many living and natural elements as possible.
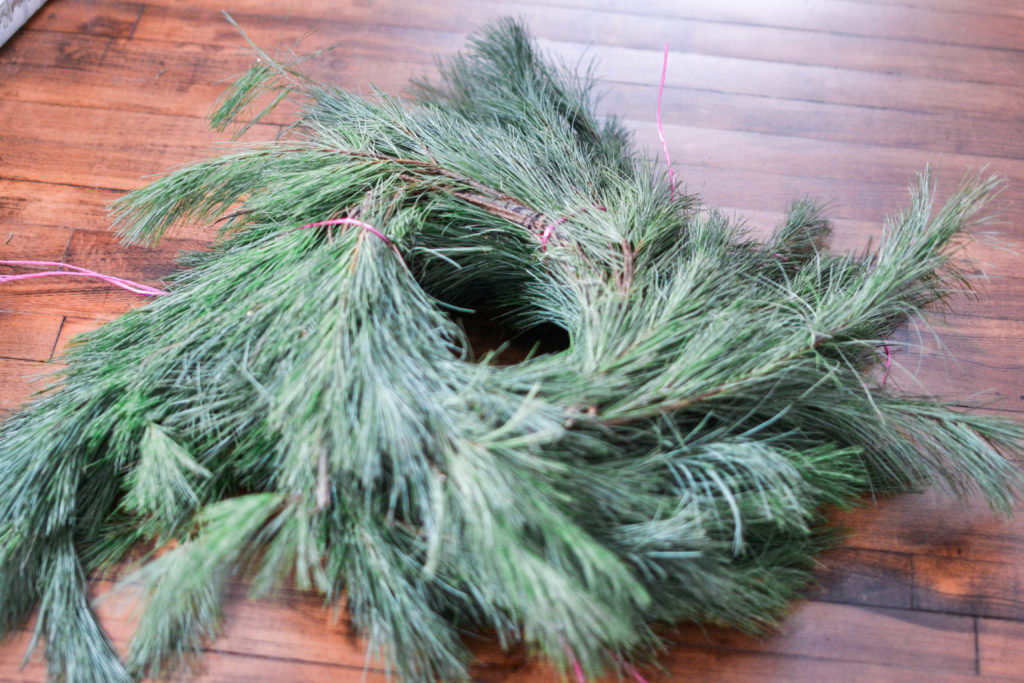
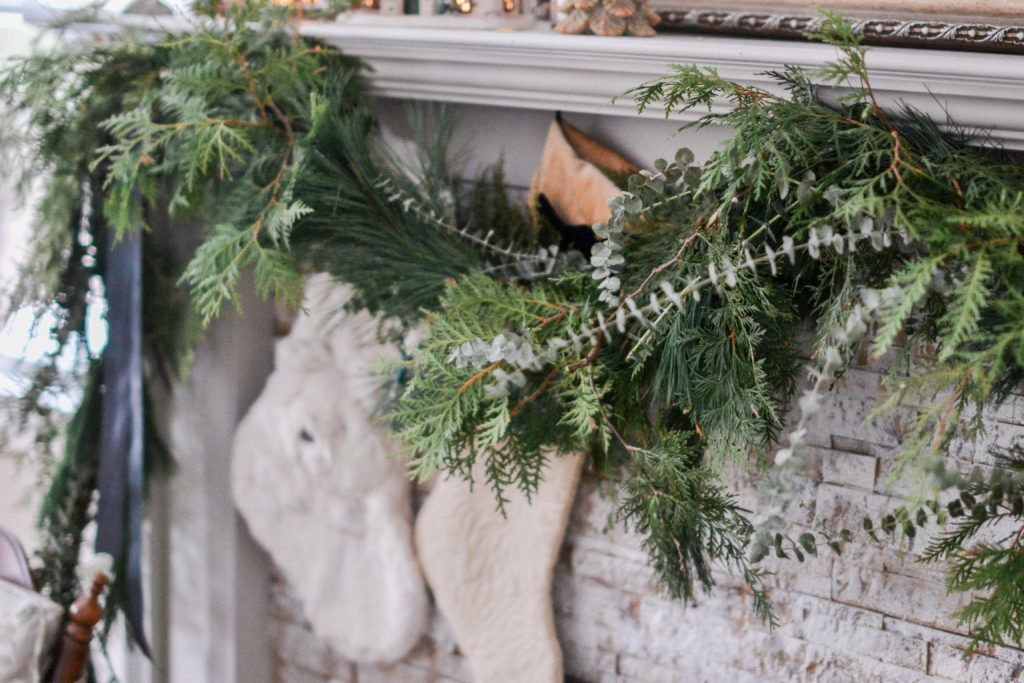
You’ll also need two other types of greenery. I used cedar which I clipped from my yard and eucalyptus which you can purchase often from a grocery store or Trader Joes this time of year, if you don’t have a florist or floral supplier to purchase it from.
I like the overall texture and dimension using a total of 3 different greenery types adds. You certainly could add just one other evergreen variety or multiple as well.
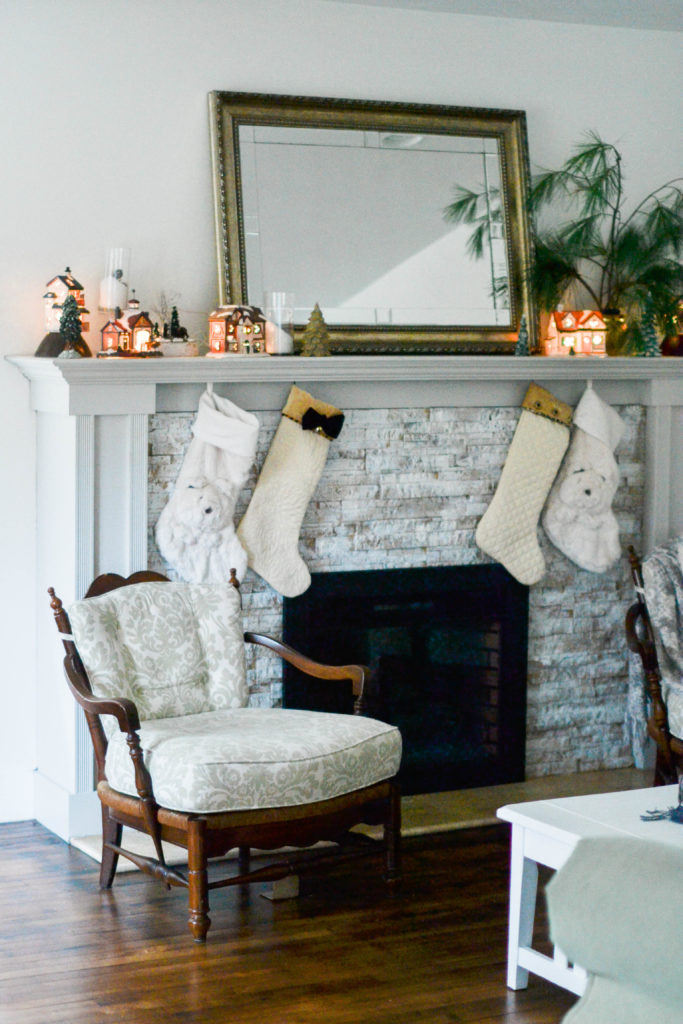
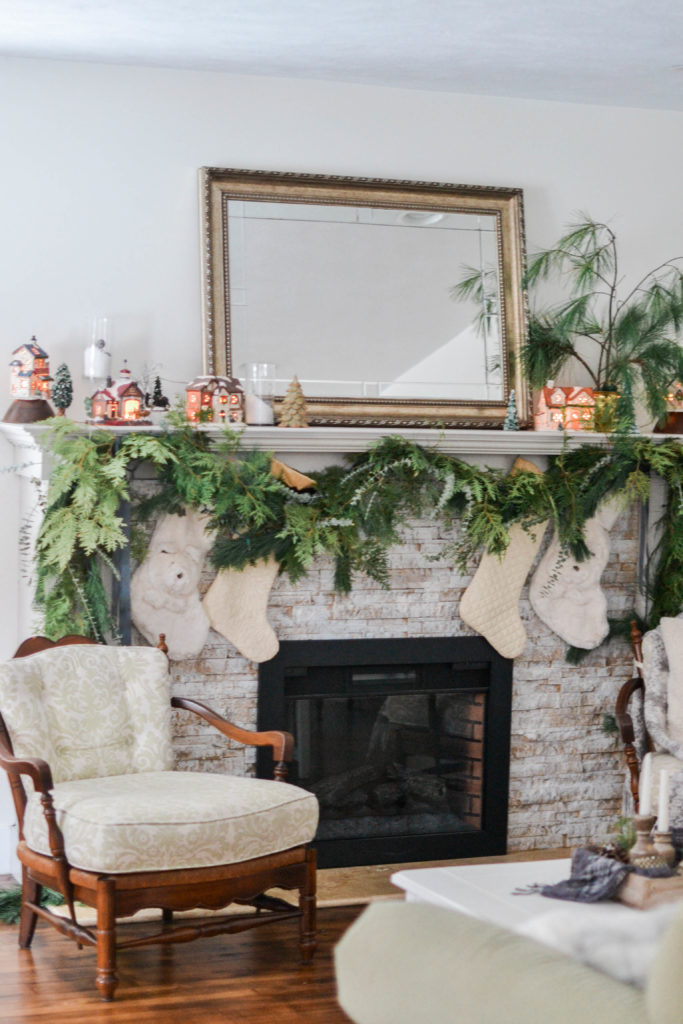
This was my mantel before. It was pretty, but seemed a little boring and I wanted to add a layer of cozy to the space.
Since I wanted to hang the garland on the front of the mantel instead of laying it across the top, I put a couple of nails into the very back of the mantel and attached the garland to fishing line which I secured around the nails. I’m not going to notice those 2 nail holes in the top back of my mantel once winter is gone, but if that bothers you, considering using heavy duty Command hooks or something similar.
Once my nails were in place, I fastened the white pine garland in place. It looked ridiculous, with needles flopping every which way and it was sparse. I had to suffer through it for a few minutes.
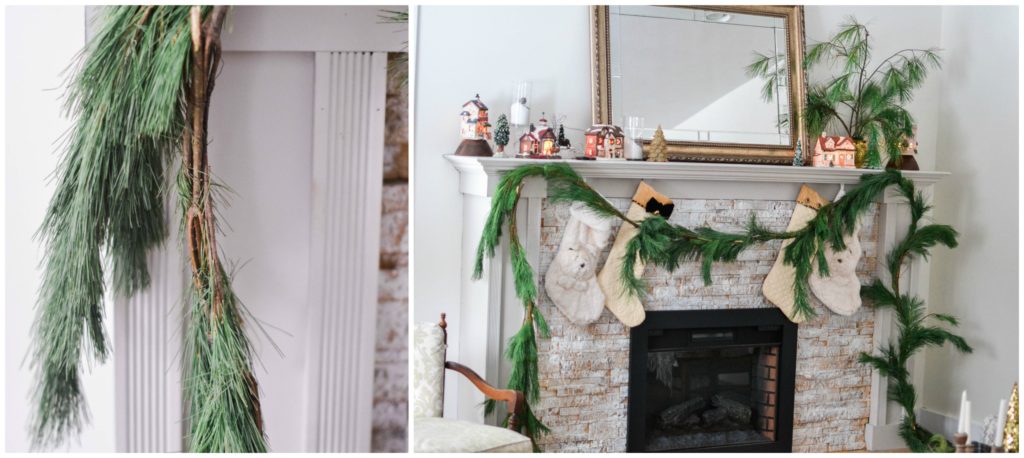
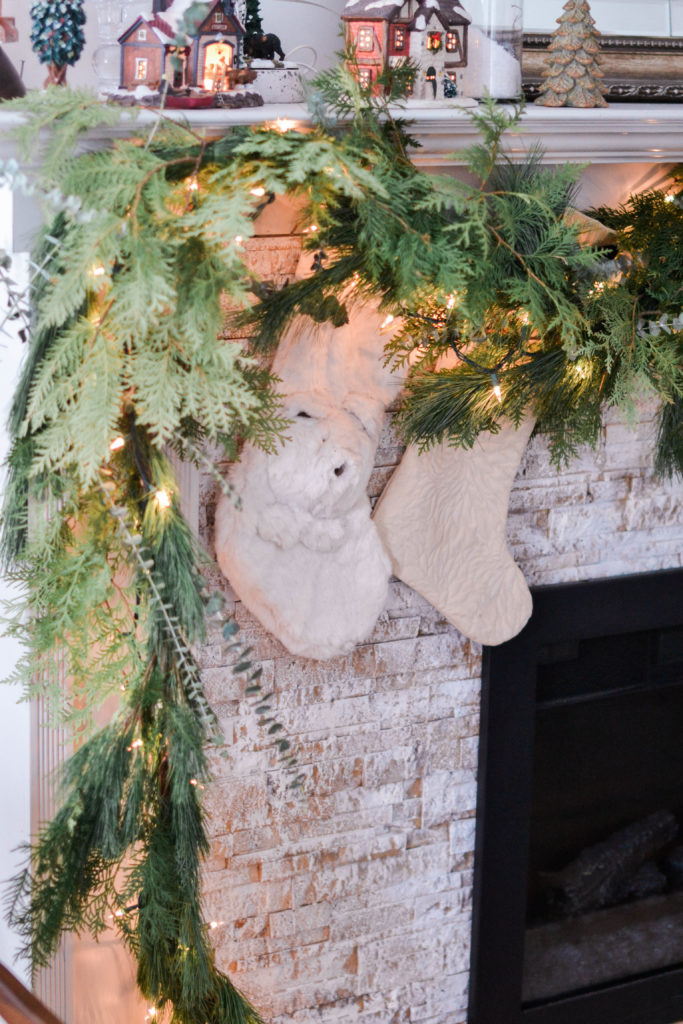
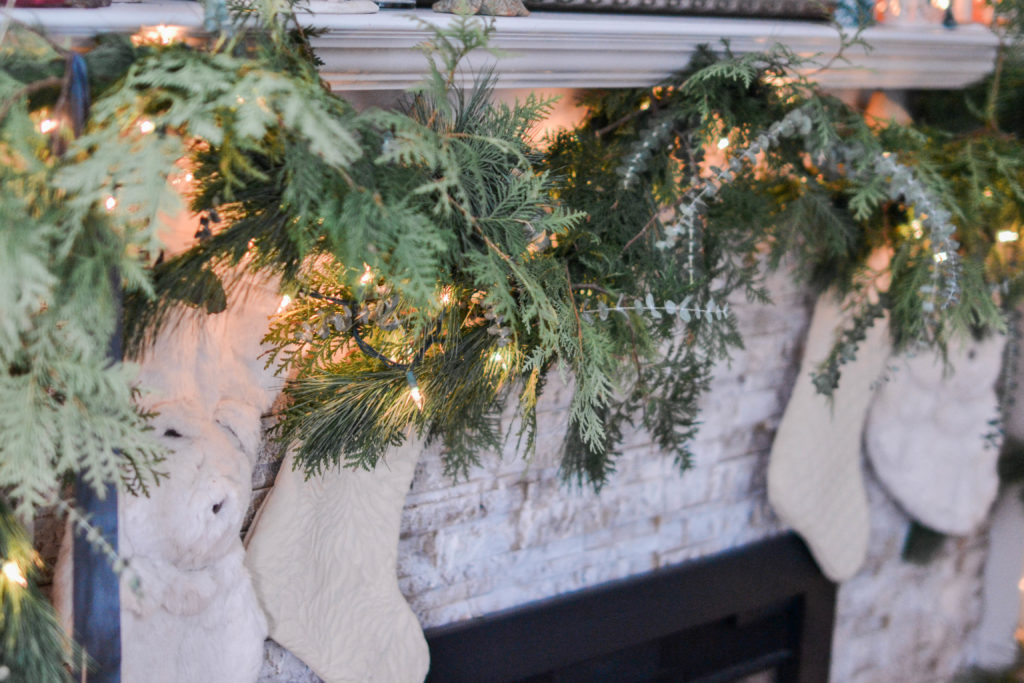
Then because it gets dark so early and my living room is one of darkness’ worst victims, I knew I wanted to add in some twinkle lights. I strung them along the same path as the white pine garland, technically they’re in front of the garland, I didn’t really take much care into weaving them in to camouflage the cords as I figured they’d be mostly hidden in the end anyway.
There were just a couple pieces of white pine that were flopping a little too wildly for me, so I did take the time to wire it (or you could use zip ties) to a friendly branch nearby, especially on the side where the pine boughs were facing up and going against gravity.
Once I had the overall shape and drape that I wanted, I started tucking cedar boughs into the pine. In most places, the wiring from the pine garland was tight enough that I could just jab it in and didn’t need to add another method to securing it. But if you have a heavy piece that won’t stick, you might need to secure it with wire or zip ties.
The cedar added a ton of volume and filled in the gaps left by the white pine. At this point I couldn’t see the wires from the Christmas lights either. I did cut my cedar from my yard, but if I were purchasing greens from the grocery store, I would say I used about 2 bunches worth to fill it in. I also focused more on the top since I knew my chairs that sit in front of the mantel would be covering the bottom portion.
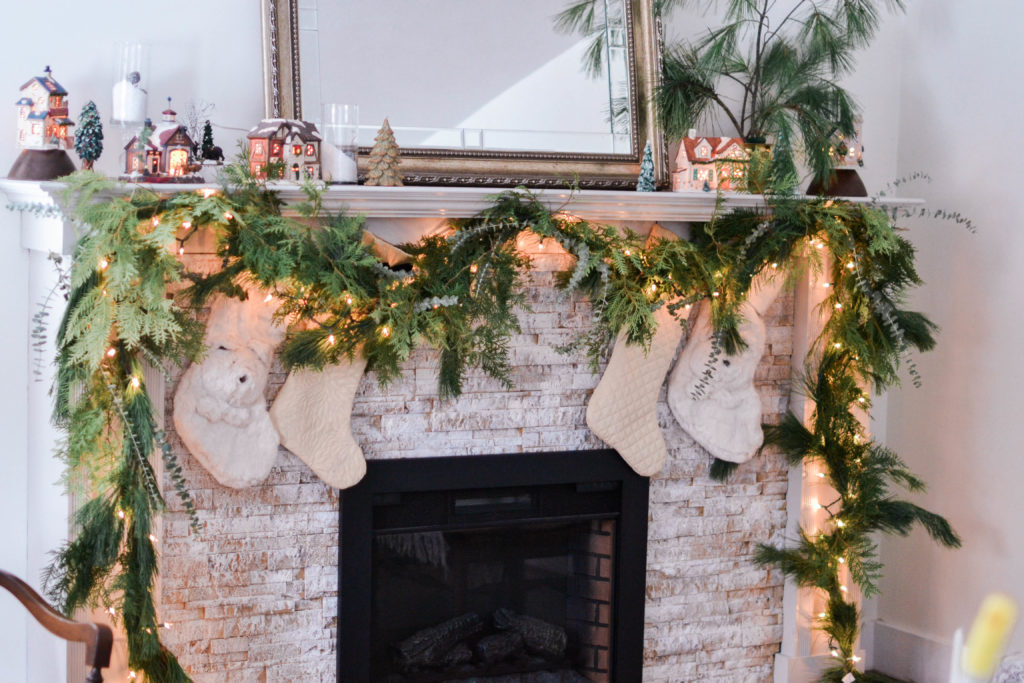
Finally, I tucked in the eucalyptus. I used baby blue eucalyptus simply because it’s what I had on hand, but any type dries naturally really pretty and adds another texture and color to the garland. Again, I mainly just tucked it into the existing wiring and only had to secure a couple stubborn pieces. If you’re using artificial garland I highly recommend using this method because it makes pulling the live pieces out at the end of the season so much easier. However, it your garland will be in a high traffic area and runs the risk of being touched a lot, you might want to invest in a few green zip ties to hold everything in place.
Then I added a couple silk ribbons to the corners just to finish it all off and plugged in the lights.
You can also watch the entire story of me making this over on The Day’s Dream Blog’s Instagram page.


LEAVE A COMMENT
View Comments